To use your TEMPO speed sensor with the CIRRUS system:
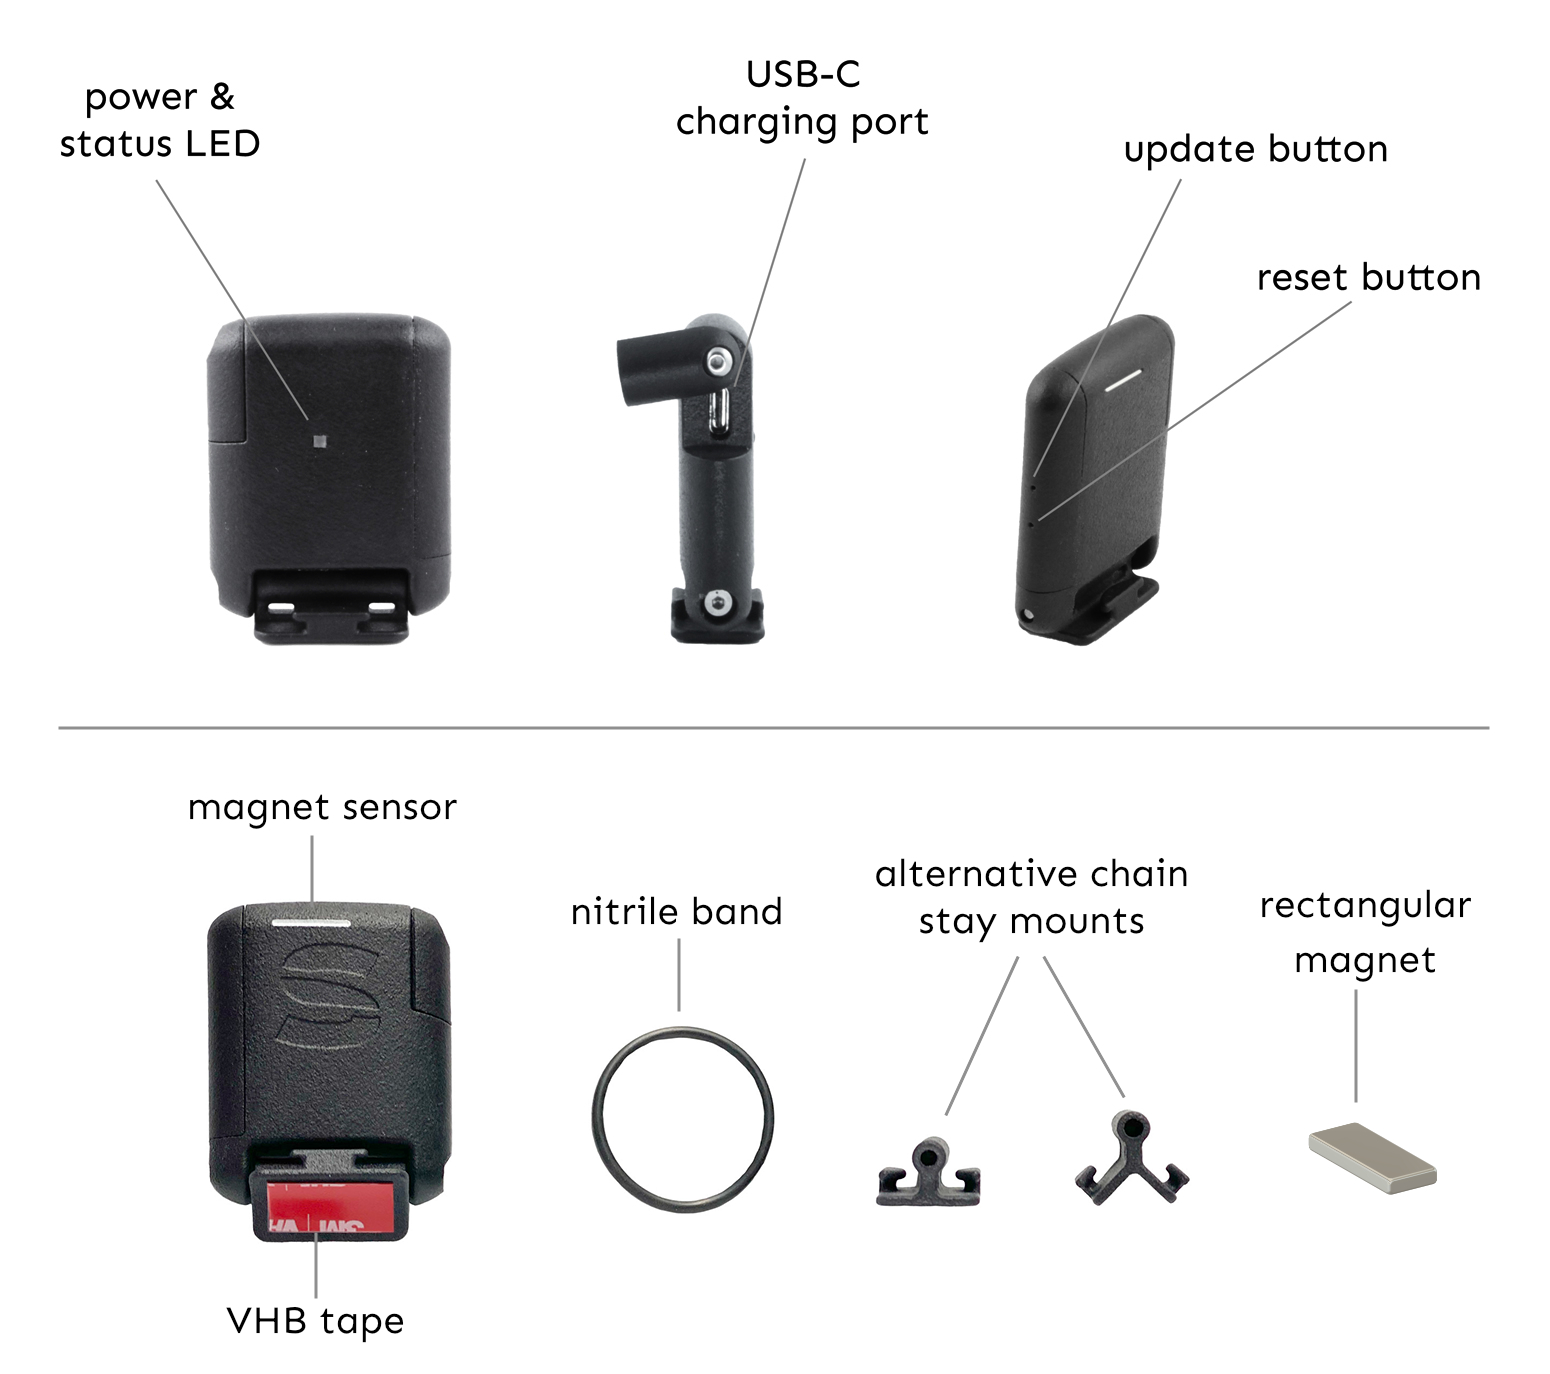
Charge the unit by partly unscrewing the charging port cover,
and connecting the USB-C cable to the charging port.
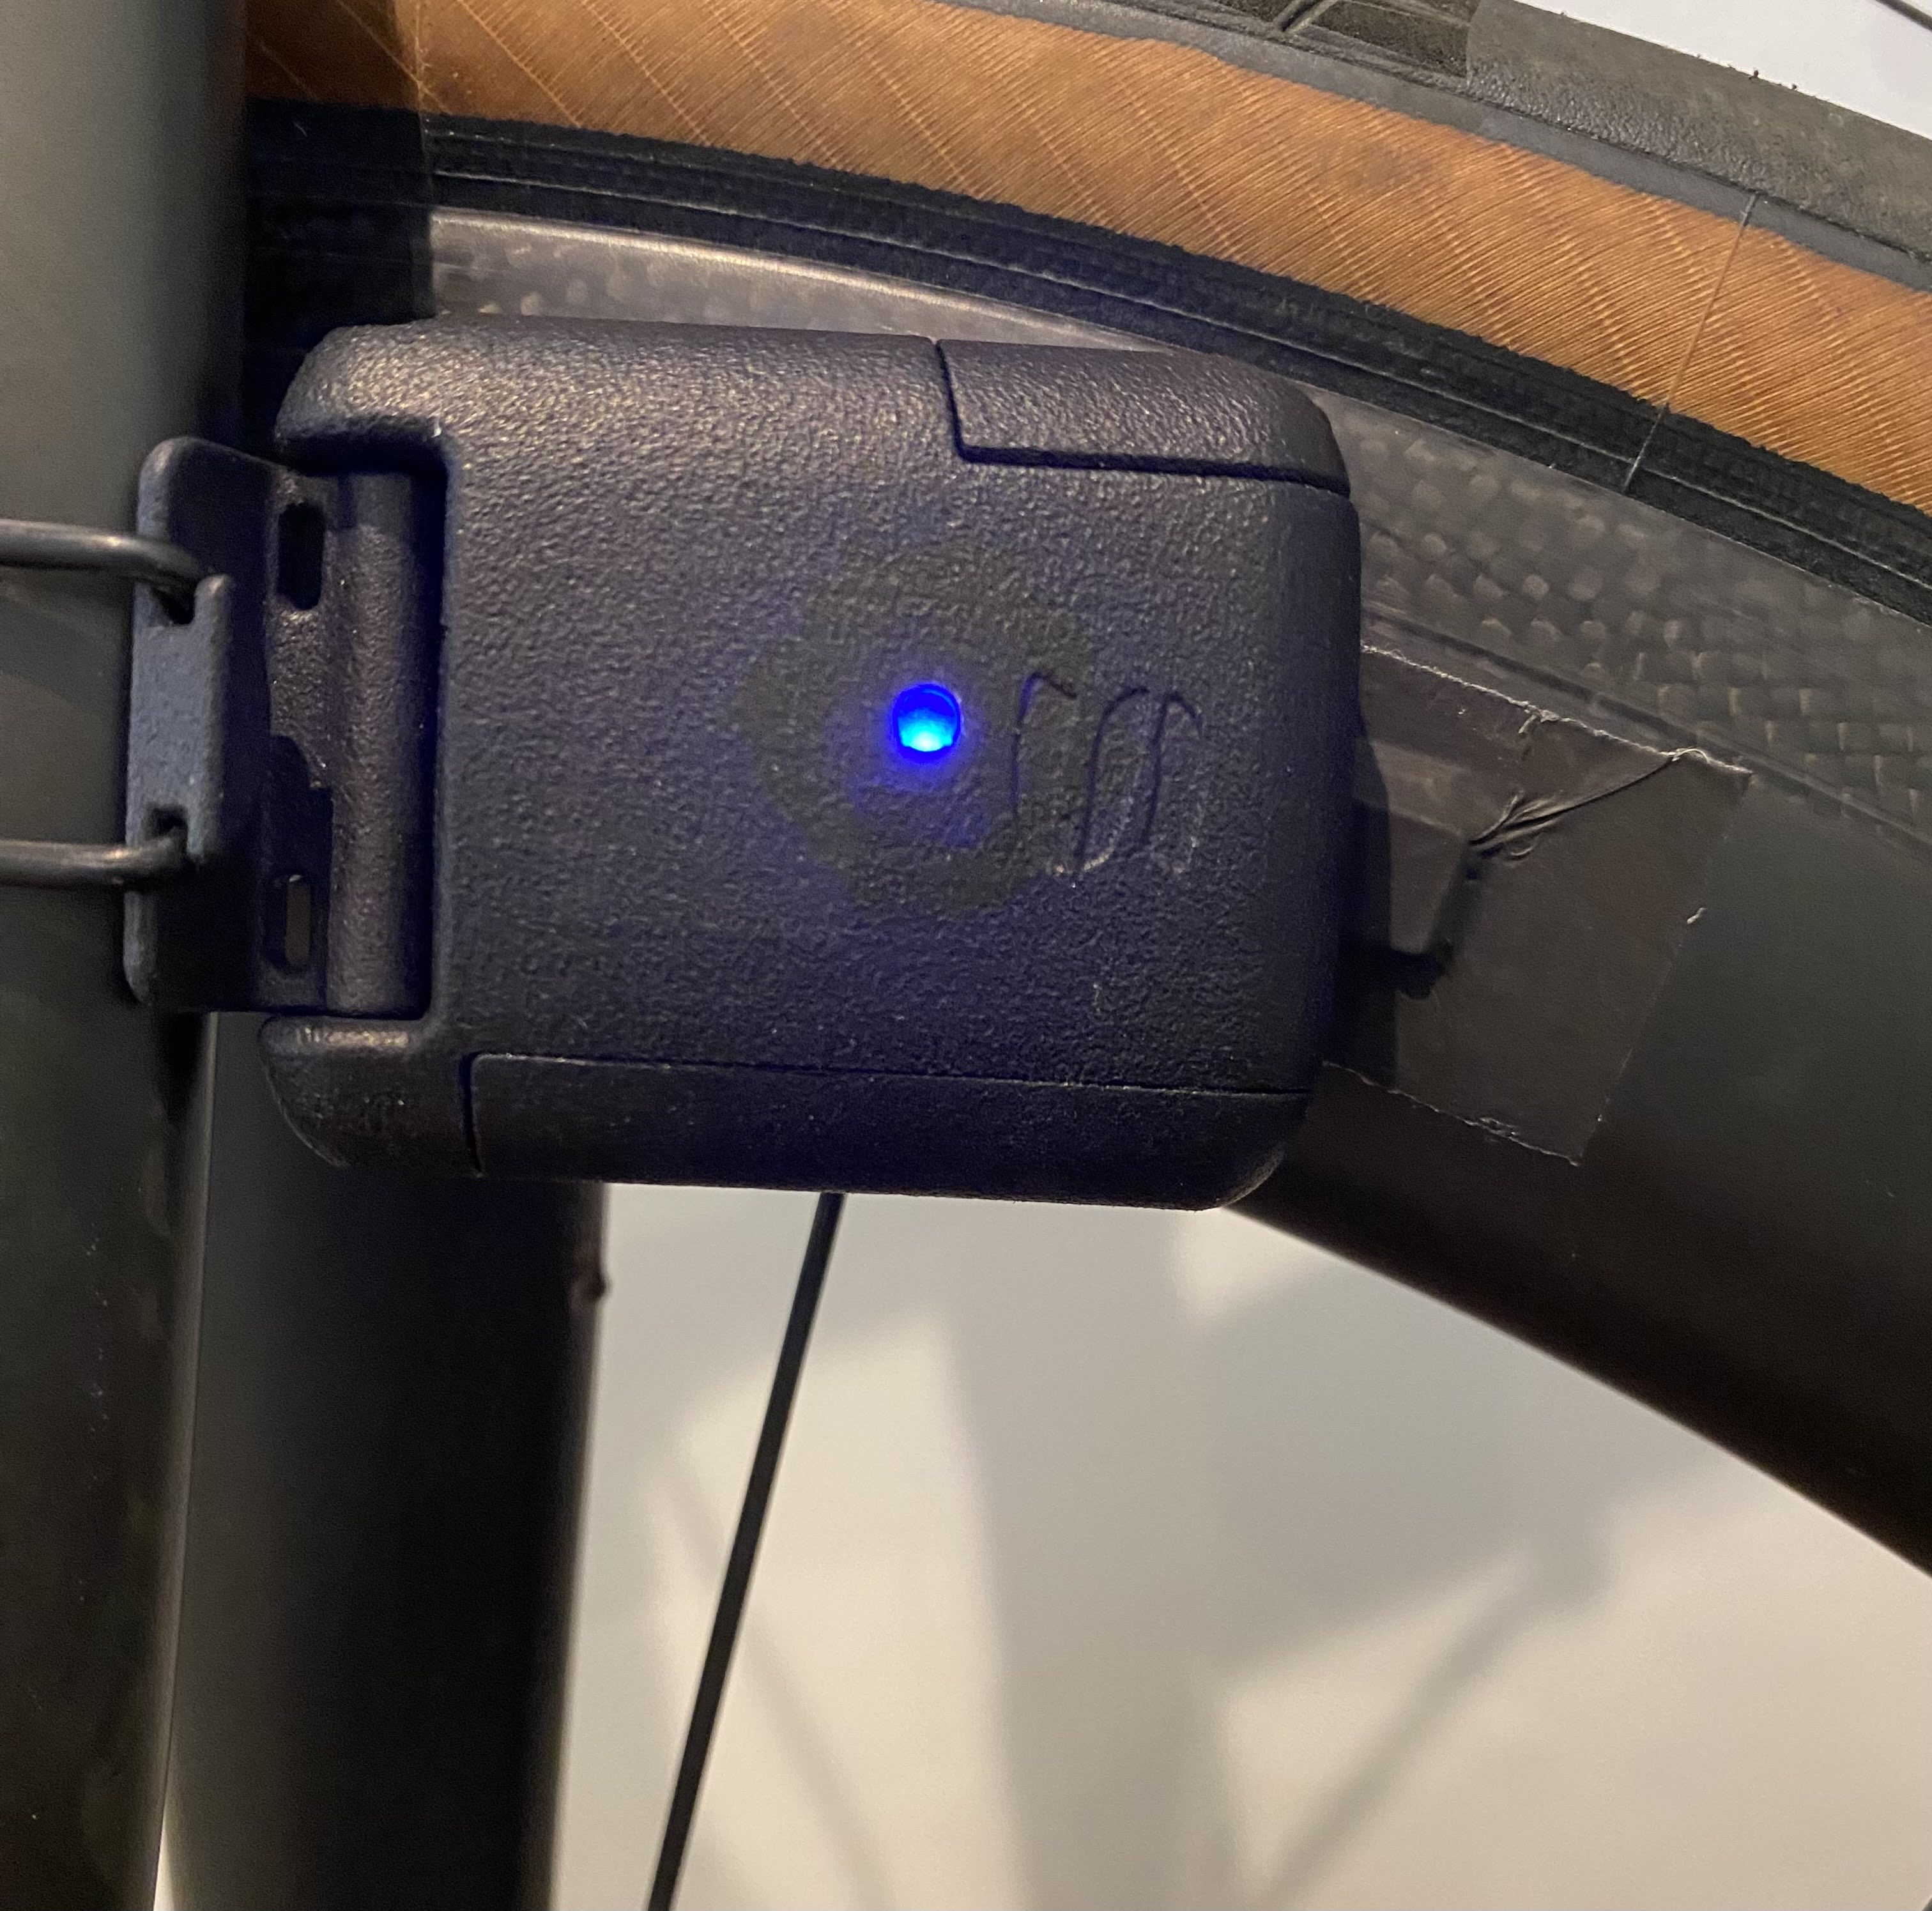
Once the unit is fully charged, the LED will flash green. A full charge takes approximately 2 hours and lasts around 40 hours.
The TEMPO will start transmitting automatically when the magnet passes the unit.
Mount the Device
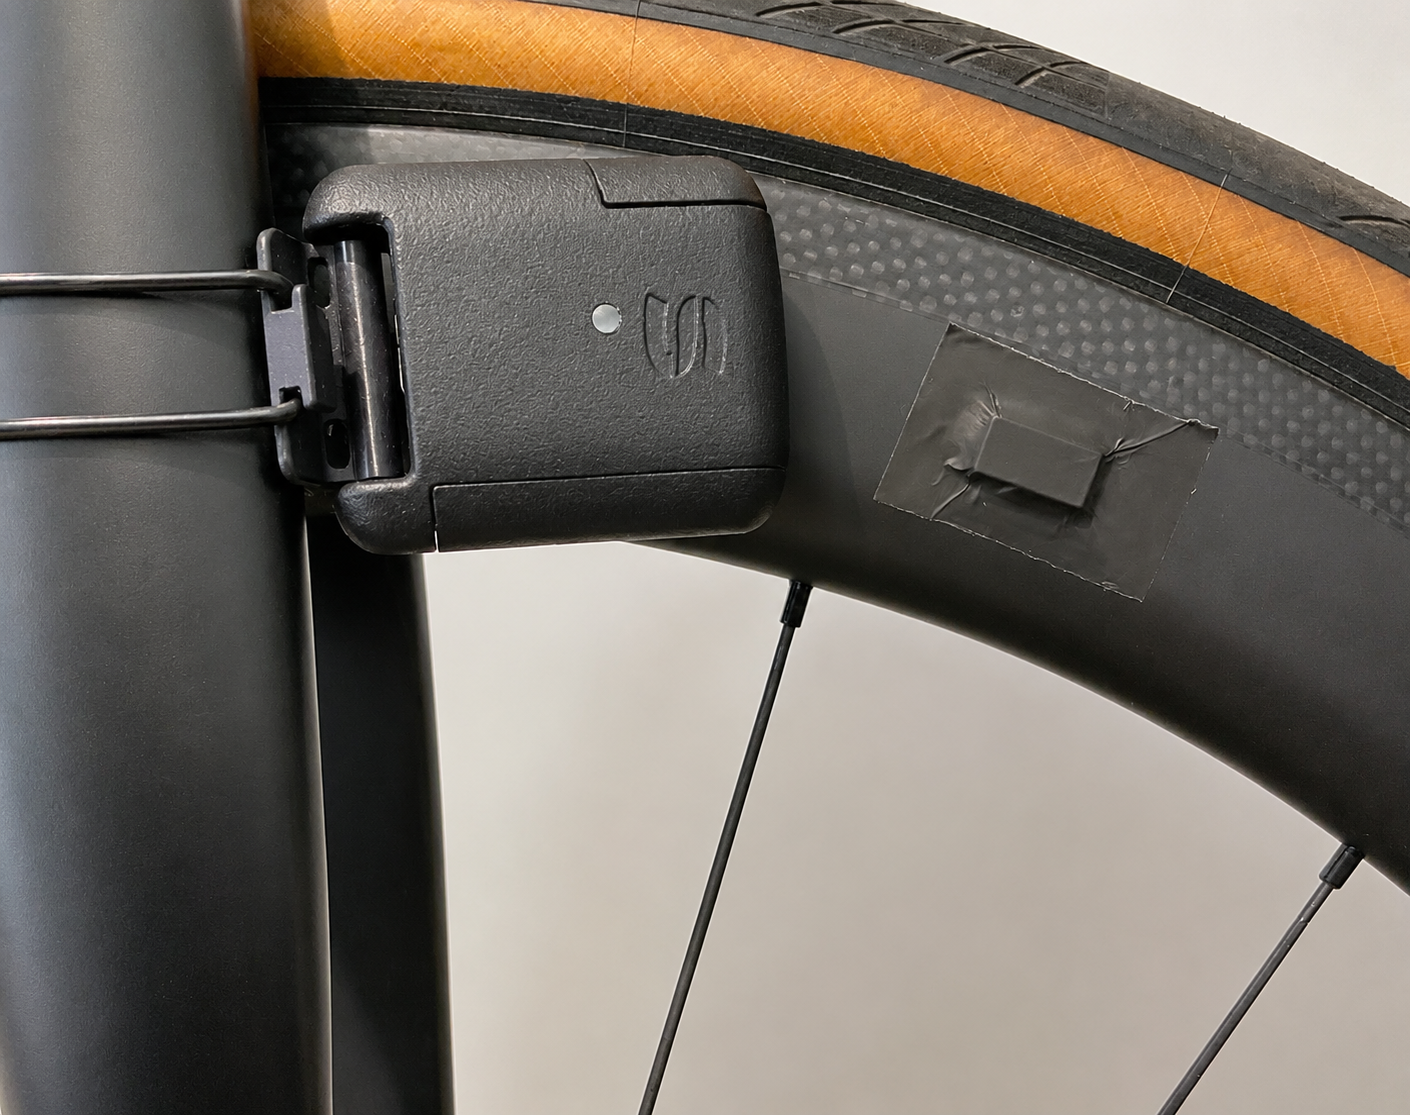
Tape the magnet to the front wheel or fix it to a spoke (see notes on mounting location below)
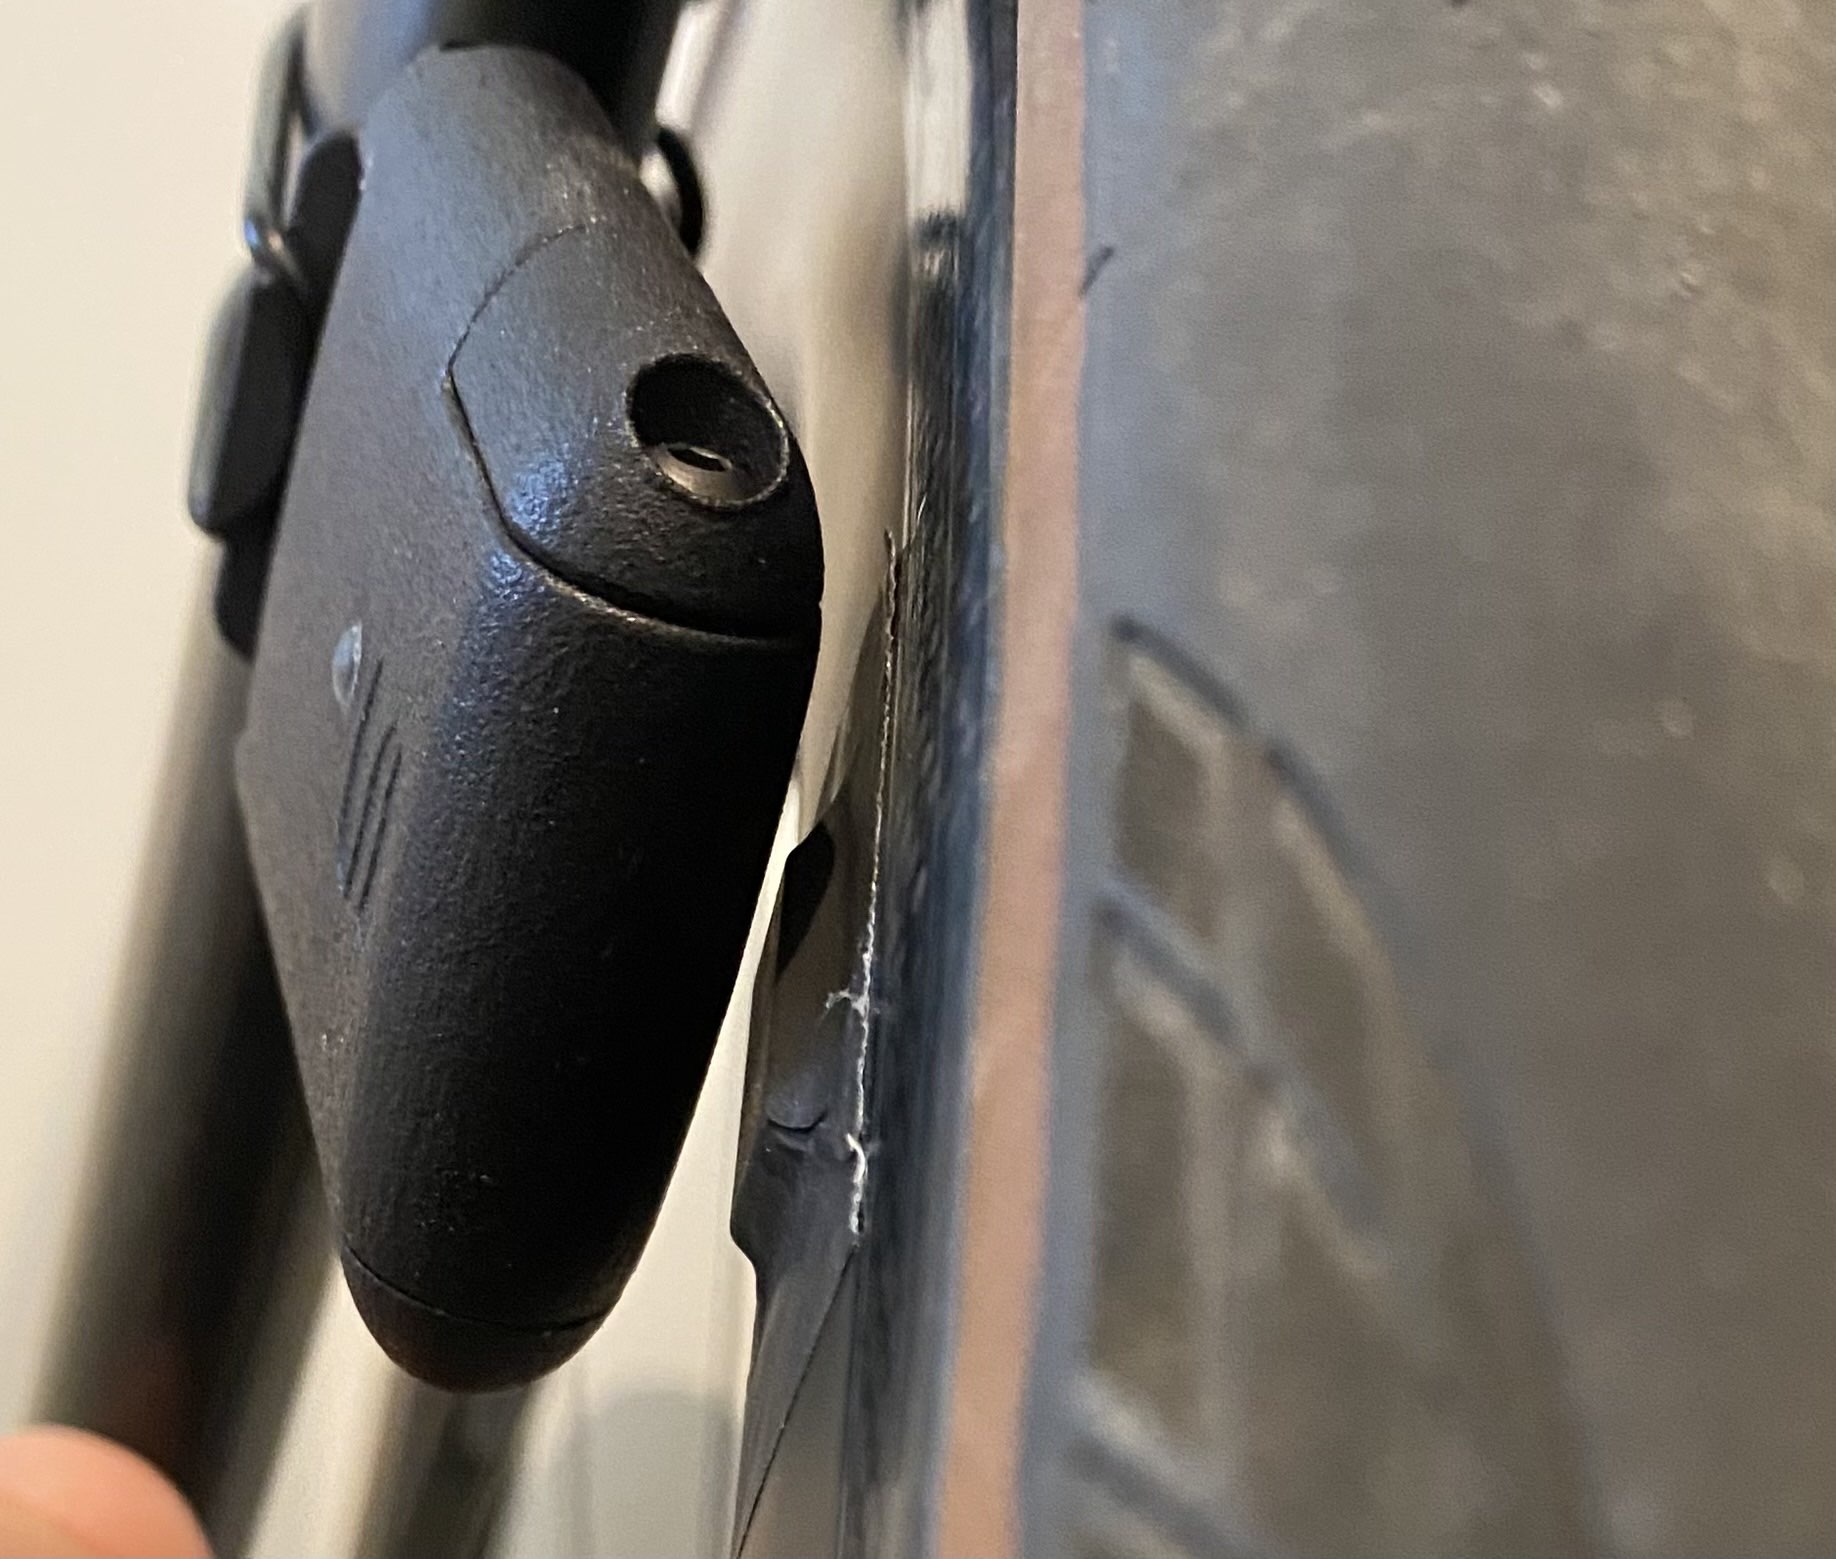
Mount the TEMPO speed sensor to the fork. The white line on the TEMPO must face the magnet. The LED will be facing away from the wheel.
When fitting for the first time, try mounting the TEMPO without bands and the backing tape in place to find
the ideal position.
Remove the backing tape and attach the TEMPO with the nitrile band or cable ties.
Slacken the TEMPO adjustment screw. The easiest method is to touch the white line to the magnet, then move to a 1mm gap and
tighten the screw.
Notes:
Timing differences between magnet types, orientation, and radial position are not measurable, but magnet skips (undetected revolutions)
can be a problem, particularly on windy days.
We recommend mounting the sensor on the front fork, on the forward-facing side. On disc-brake bikes, a bar magnet taped to the rim
is usually the best option.
The forward side of the fork is preferable because any contact pushes the sensor away from the wheel rather than into it. This allows
an initial gap as small as 1 mm to the magnet.
A bar magnet 2 mm thick or more produces a considerably stronger field than a round magnet, and holds its orientation and position more
consistently than a spoke magnet.
These recommendations are all aimed at avoiding magnet skips. At high yaw angles in windy conditions the wheel can deflect by more than
5 mm, which is enough to cause skips in an otherwise stable configuration.
We also recommend a front-wheel mounting, because the rear wheel typically rotates 0.2 – 0.8% faster than the front (and faster than a
loaded rollout would suggest) as a result of tyre slip. The exact figure varies with gearing and applied power. A front-wheel mounting
is therefore slightly more accurate, particularly where the logged data covers a wide power range.
A rear-wheel position is viable if front wheels rather than rear wheels are being swapped during testing, or if the front position is
impractical because of the bike's geometry.
Avoid changing between front and rear magnet positions within a single comparison. If this is unavoidable, account for the measured
difference in wheel circumference.
The increase in aerodynamic drag from the magnet taped to the rim is insignificant, it will be less than the aerodynamic drag from
variations in fingernail length, and should not be taken into account.
Connect the Device
To connect the TEMPO, follow the steps you would normally use to connect any ANT+ device. The TEMPO turns on automatically when it detects the
magnet, or can be turned on manually by pressing the power button.
Reset & Update
Reset the TEMPO
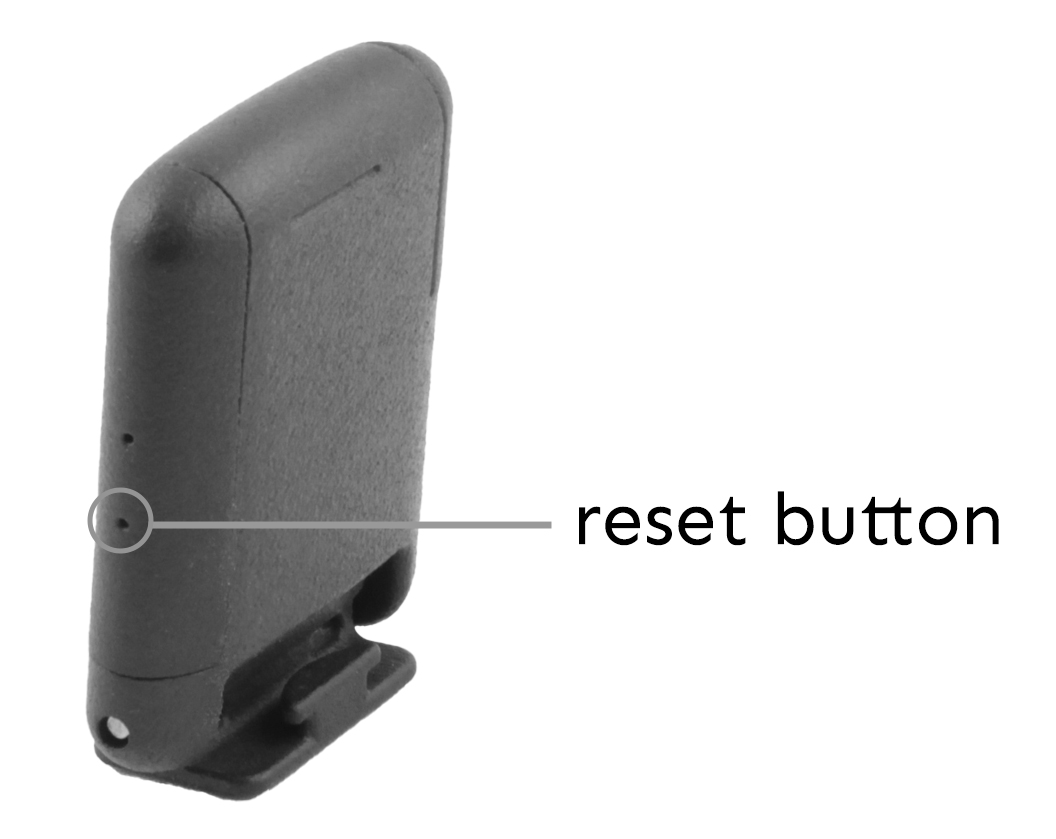
If the TEMPO device becomes unresponsive you can manually reset it by inserting a pin into the hole above the charging port and
pressing it down for 3 seconds. This reset only cuts off the power and will not erase any stored data.
Update the TEMPO
Please periodically check if your TEMPO sensor is running the latest software version by downloading the Streamlines Firmware
Updater App (available at the iOS App Store and Google Play Store) and updating it when appropriate.
Download Links
How to use the Firmware Updater App:
Ensure Bluetooth is turned on phone
Open the Streamlines Firmware Updater App
Select 'TEMPO' on the top tabs
Press 'Load from server' button
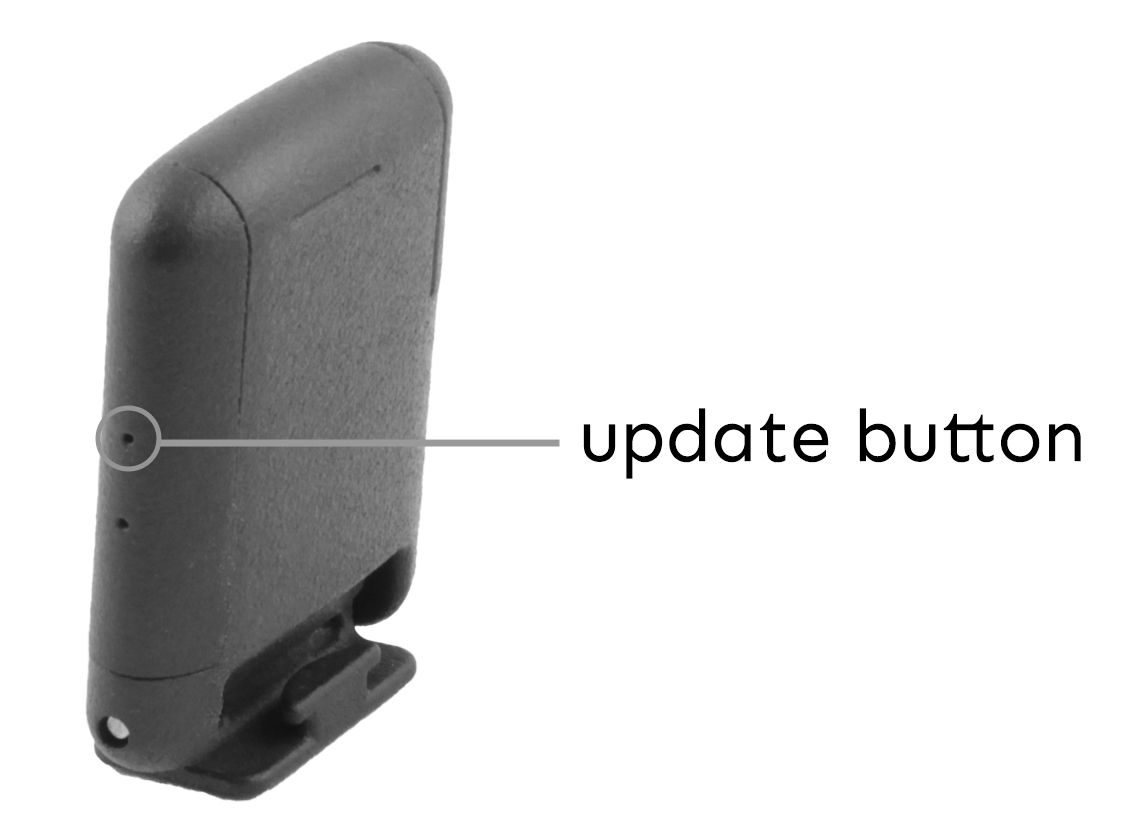
Then, press the TEMPO device's update button 10+ times; the LED should blink red & green
Next, press the 'Start update' button on the app
On the TEMPO, the LED will flash blue while updating, then it will flash blue and cyan once the update is complete
Important Safety Information
WARNINGS:
Pay attention to your surroundings and use your best judgement to ensure you always operate the bicycle safely.
Before turning around after completing a traverse, we strongly recommend that the rider comes to a complete stop and ensures that no vehicles are behind them.
Your bicycle and hardware should be properly installed and maintained at all times.
The use of LED lights is always recommended during testing.


 WARNINGS: